Off-Bottom Cage System Explorations and Experiments Part II
Cage Handling On Deck, Bridles, Daisy Chains
Proper cage handling skills are vital for an oyster farm like ours, where the goal is a premium quality oyster grown in its natural underwater habitat while sheltered in the safety of cages.
We presently run a three-tier cage system, using stackable trays that we build and maintain ourselves, as shown in Part I. Cages in service are ghost-lined together underwater, so cage wrangling, on land and the water, is a big part of our work.
A crew member can learn cage management, and knot tying, with practice and sincere effort, which leads to attitude. What attitude entails and the role it plays in our process will be covered in the future. This section addresses some key cage wrangling skills.
Cage Management While We Tumble
Tumbling oysters is a key element of our grow-out method. This process literally spin-turns oysters through a tube with holes. Frequent tumbling encourages oysters to develop strong shells and the desired meat-filled deep cup. The diffently sized holes service a purpose, too. Those that drop through go back into the water for more growth. Only market-sized oysters make it all the way through and are harvested. See how it works in the video above.
Cage wrangling skills covered here deal with what to do with cages as they’re hauled aboard; opening them up, and repacking them with oysters headed back into the water.
Abilities to tie a bowline (pronounced bo-len) knot and use proper body mechanics for lifting are basic skills for each crew member, setting the pace for working safely and productively.
As we haul cages aboard for some lively tumbling, the crew moves efficiently because each person knows their job and understands each step in the process. Cages are landed, opened and emptied into the tumbler, lined up for reloading, secured, and lowered back into the water. At the same time, oysters are being sized, harvested, bagged, tagged and iced.
Protect Your Body And The Cage
Lift A Cage / Don’t Drag It
Space your arms shoulder width apart and grab the bridle with two hands. Remember to work from your legs as you lift up and carry the cage where you want to go. Never drag a cage. Dragging a cage on land beats up the cage and your body. The cage legs get worked over, the anti-fouling coating gets beaten off and the mesh corrodes. Most of the time, cages get beat up out of the water, not in the water. Cage dragging typically involves awkward body mechanics, which can be a set-up for pulled muscles or other injury.
Watch Out For Those Latch Clips
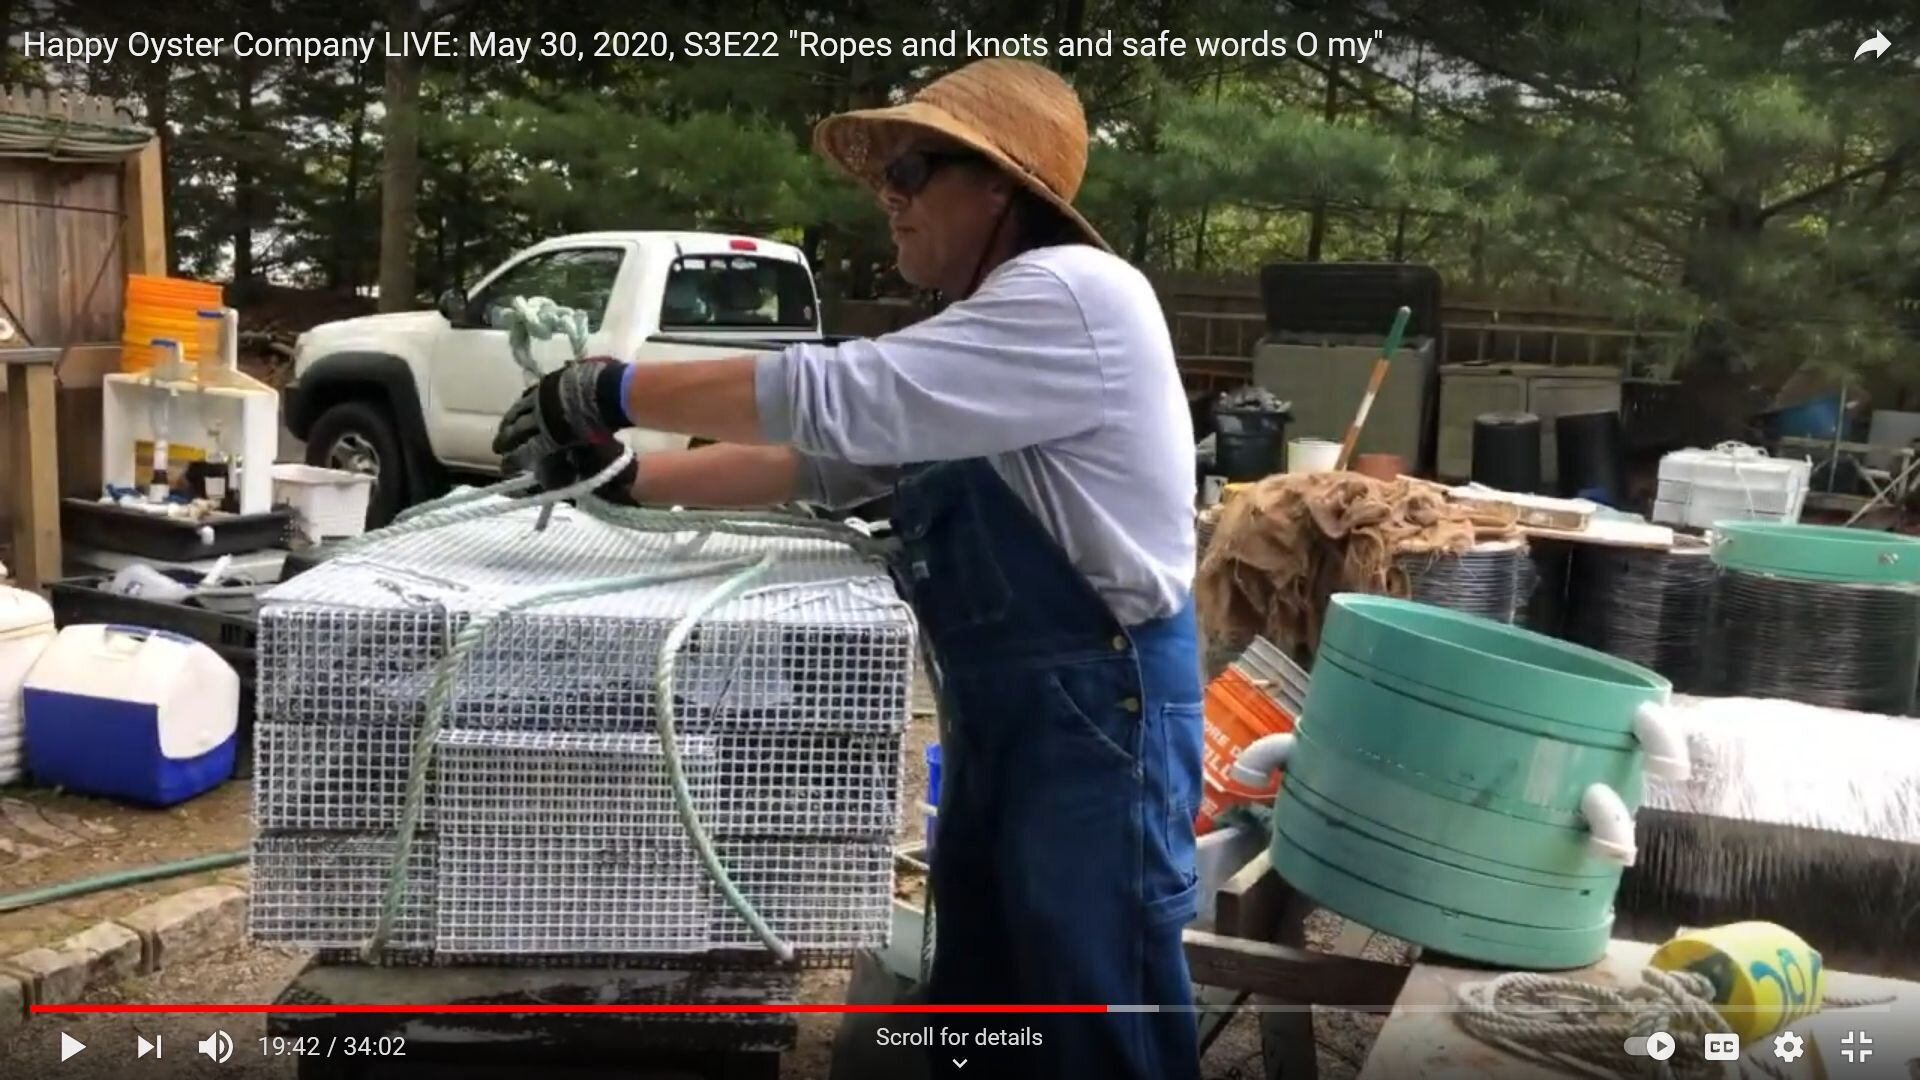
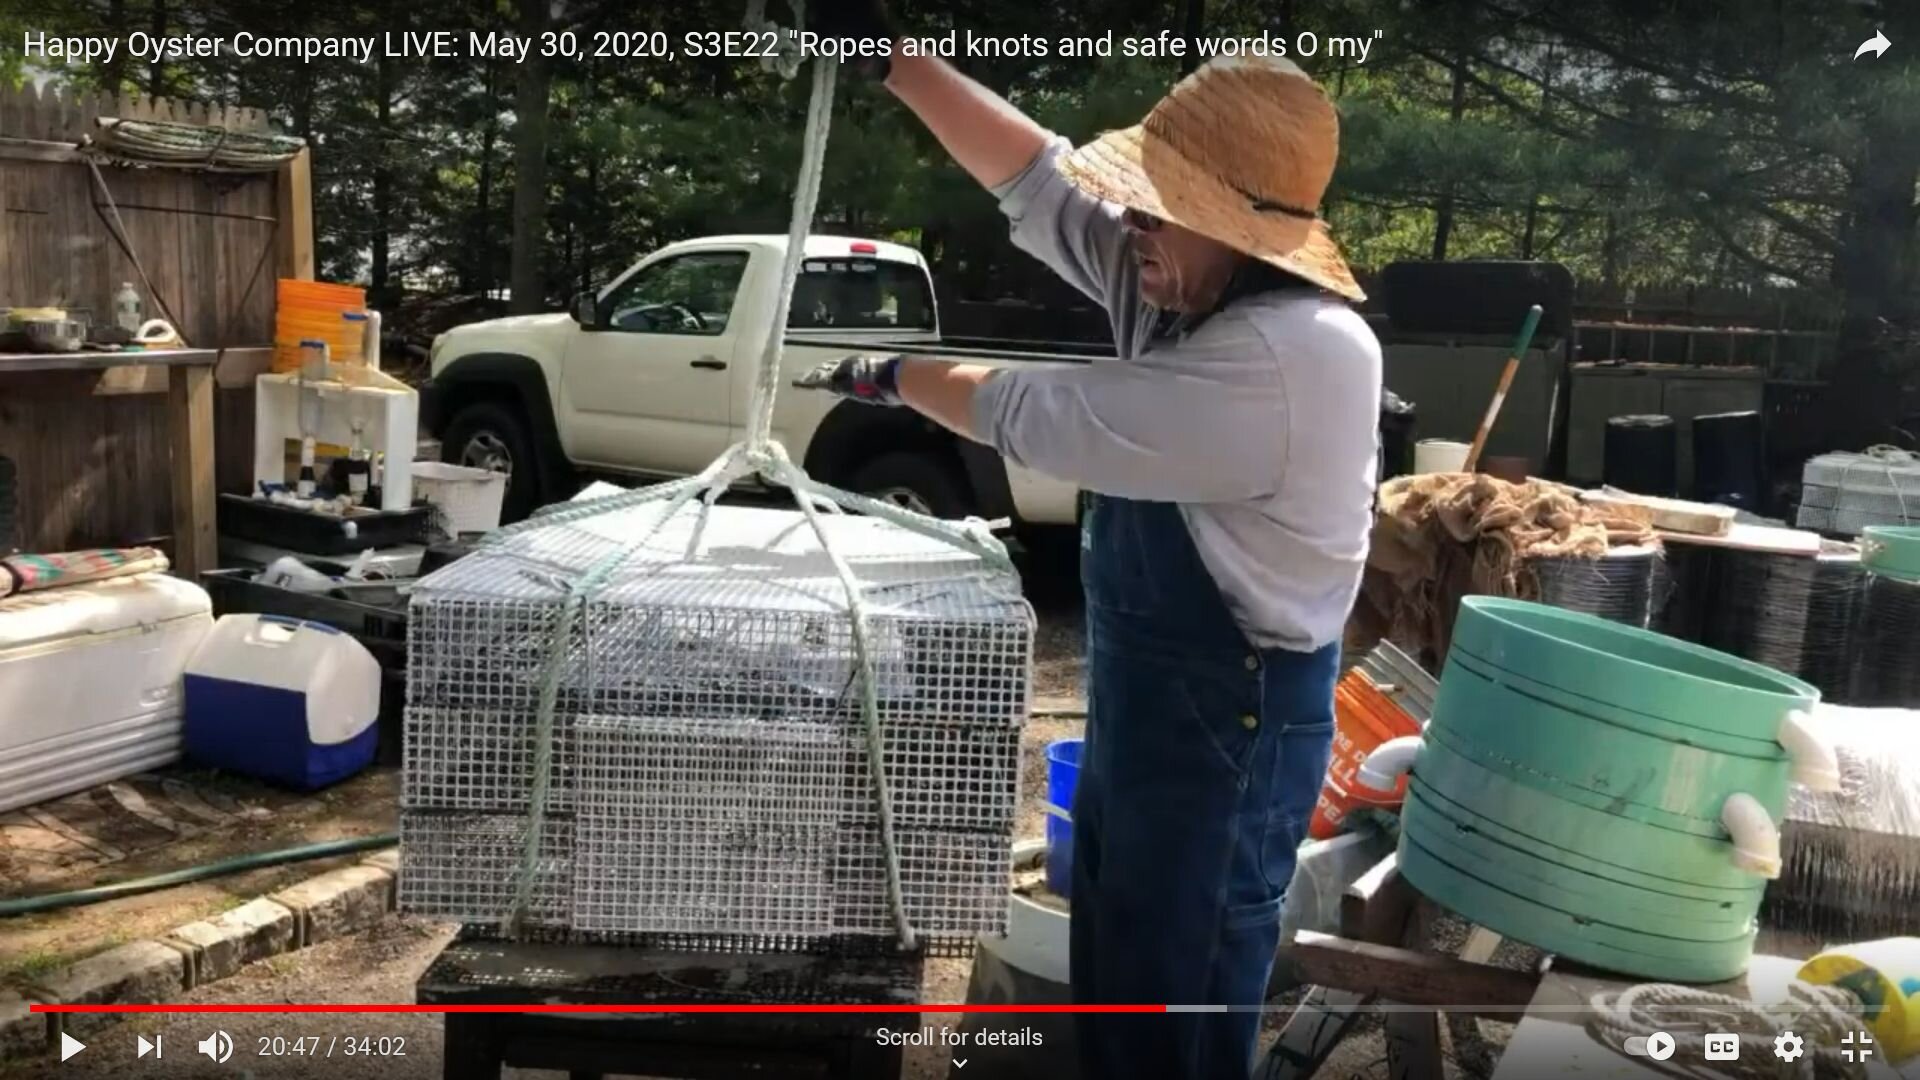
Latch clips are the mesh doohickeys we make to secure the cage tiers. We’re looking for and testing a better method. In the meantime, the pesky clips want to catch on everything. They will grip your waders, so be careful of those. Below is a video screen-grab showing proper cage lifting.
Unbutton The Cage
Now that the cage is on deck or land, we want to open it. We call this process unbuttoning. It’s essentially the same whether the cage is empty or the three tiers are filled with oysters. Work safely. Speed will come later.
Daisy Chain The Leader Line


I’m going to hand you the long line clips with the leader lines. Clip the long line onto the leader line and make a loop once. This is the start of a daisy chain. Then you’re going to reach for the free line and pull it through the loop. Repeat to create the loose daisy chain shown in the screen-grabs above. Daisy chaining is covered in this how-to video. The longline clips we use are tough, so this process will take some practice.
When we are processing a boat load of oysters per hour, this is the way it’s going to go. When we come to the end, hook it up again. You can have multiple daisy chain leader lines and you don’t care how tangled up they are because when you need one, just pick it up and it frees itself from the others.
Remove The Bridle
Start by unwrapping the bridle’s bowline knotted loop (the bow, as in Christmas package) from the other rope loops on each side of the cage that make up the bridle.


Release The Latch Clips
A HAPPY OYSTER cage is secured by a latch clip attached with rubber cord on each of its four sides. The rubber gives the clip a spring-load action. To release a clip, pull it out toward you and push down. Be careful. Flip the clip onto the top of the cage temporarily get it out of the way. Avoid letting it catch on things or your body.
Separate Cage Tiers One At A Time
The HAPPY OYSTER CO. YouTube Channel video screen-grabs below show the unbuttoning sequence. Watch the LIVE Show how-to video here.


Safety First
When the boat is rocking and you’re reaching over, safety takes no holiday. Do not fall overboard. Do not hurt yourself. Take your Time. Think about your work and what you’re doing. I guarantee there’s an easier way than muscling it.
As You Unbutton, Plan For The Reload
Cages are hauled aboard one at a time. At any time, there’s likely to be up to six cages on deck as oysters shake through the tumbler for sizing. When you land a cage on the deck or table, be prepared for what’s next.
Make Sure The Loops Are Clear
Loops of rope, secured to legs underneath the bottom tier, make up the bridle. Pull any tangled loops free and flip them onto the top tier. This is a must-do step to prepare the cage for buttoning up the bridle and putting it back into the water.
Line Up The Tier Trays
It’s so much easier to line them up before you load the bucket. Don’t load all three tiers with tumbled oysters and then try to line them up. Line them up as you go. Safety. Accuracy. Speed. I cannot emphasize it enough in that order.
Worrying Is NOT Your Job
Do you put the big oysters on the bottom or what not? Don’t worry about it. That’s my job. Or Toni’s job. Toni’ll tell you which ones are going in because she’s the one writing it down.
Buttoning Up The Cage
Check Your Work
Are the re-loaded tiers lined up flat and straight? Are the bridle loops clear of the bottom? Presumably, you’re watching out for those pesky latch clips, which should be laid on the top and ready for you to secure.


Clip The Latches My Way First
Again, when these (cage) tops are on board - and you’re going to have six tops at a pop - and these latches are catching on everything, you must have procedures. If you come up with a procedure, I’m all ears, but learn my procedure before you start mouthing off. I’m not ridiculing. I’m just saying let’s try it my way and then you can try it the next way. I do want to hear what you have to say, but don’t get upset if we’re not doing it right away.
Latch Clip Procedure
You’ll be working around all four sides.
Make sure the latch is in the middle of the stack.
Push down firmly on the latch.
Make sure it’s clicked into place.
Gather The Bridle Loops
Stand behind the side of the cage that has the loop tied with a bow (as in bowline knot or Christmas package.) Pick up the bowline loop in one hand.
In the other hand, pick up the loop directly across from you. Pass the bowline loop through the other loop and bring the bowline back toward you.
Pick another loop. Pass the bowline loop through it. Do the same thing with the remaining loop.
Bring the bowline loop with the others to the center of the top cage as you lift the bowline loop toward the sky. It should look like a Christmas package with the bowline loop held high and in the middle, neat and straight.
If you’re a new crew member or looking to join our team, I demonstrate the process in this instructional video.
Make The Bow and Clip It
Take the bowline loop in one hand and the other three loops in the other. Wrap the bowline loop around the other three one or more times. Usually, we do two wraps. However, it might be one or it might be three.
Shake out one of the leader lines that you’ve daisy chained.
Use the long line clip to hook the bowline loop to the leader line.
Resources
HAPPY OYSTER COMPANY YouTube video Oyster Tumbler
HAPPY OYSTER COMPANY YouTube Channel
How To Tie A Bowline Knot
Off-Bottom Cage System Explorations and Experiments Part I

